So, what does sustainability mean? As Ray approached it in the mid-90s, it’s a holistic approach to making the present world less wasteful, less polluting, and less harmful so that future generations can benefit—that’s the sustainable part. Manufacturers do that by making the process, the products, and the lifecycles of those products less harmful to people and to the environment. For it to work, everybody must do their part. Whether it’s recycling, conserving electricity, consolidating trips, or simply avoiding wasteful habits.
Taylor Adhesives discovered long ago that making a sustainable way to install flooring was good for business as well as the planet. In the late 80s, Taylor R&D was already at work to create the first solvent-free flooring adhesive in the U.S. Taylor has not only led the industry with product performance, but with sustainable formulations that are not only good for the environment, but safe for consumers and flooring professionals. Many of Taylor’s products contribute to LEED v4 and have extremely low odor with low Volatile Organic Compounds (VOCs) off-gassing that contributes to poor Indoor Air Quality. Taylor was the first adhesive in the flooring industry to earn the CRI Green Label Plus® certification from the Carpet & Rug Institute for Indoor Air Quality. Taylor was the first adhesive in the flooring industry to earn the GREENGUARD® certification from the GREENGUARD Environmental Institute for Indoor Air Quality and chemical exposure. The same is true for Taylor firsts with FloorScore® and for Cradle to Cradle™ certifications.
All these certifications provide assurance that the Taylor products that display these are made with the health and safety of our customers, our installers, and our end-users in mind. The result has been that our competitors have followed suit and made their products more responsibly, and that’s ok with us. We all need to do our part.
With all the focus on sustainability, how can you, if you are a dealer or a flooring contractor, adopt a sustainable approach to your business that will resonate with your customers? You need not be a multi-million or billion-dollar corporation to operate as a sustainable brand. You do need a plan, determine what initiatives to tackle, make social responsibility initiatives part of your plan, and communicate your stance and your activities to everyone. For an in-depth look at a 10-step plan, see How to Create a Sustainability Program: A 10 Step Guide to Creating a Purpose-Driven Business.
Not all wood substrates are the same since they can be solid core, plywood, OSB, particleboard, MGO or another composite. Some wood substrates may have fire retardant properties, which may attack the flooring, patch or adhesive. There are also waterproof OSB and plywood products that may be difficult for adhesive or patch to bond to. Pressure treated plywood can contain chemicals that may be toxic and can attack patch, adhesives, and flooring. Stains, sealers and paint can also be a concern if the wood was used as a wear surface at one time. Remember to test for lead before starting the project per the EPA RRP guidelines if the building was built prior to 1978 (this applies to all substrates). It is always advisable to check the moisture content of the wood using a pin meter with a wood setting prior to starting the project. The expected moisture content of a wood substrate will vary from region to region and even the time of year. You need to know what to expect in your area.
Concrete substrates:
Not all concrete substrates are the same. Admixtures, curing compounds, hardeners, sealers and bond breakers can all create problems for a flooring installation. Some new concrete slabs may also contain super plasticizers that can react with the patch, adhesive and flooring. It is essential that you know what you are working over so you can plan the best course of action for your substrate preparation. Proper moisture and pH testing is essential. Most flooring, patch and adhesive manufacturers require moisture testing using calcium chloride ASTM F1869 or In Situ RH ASTM F2170. Either of these tests will provide the necessary information you need. You should also consider the age of the slab as part of your moisture testing procedure. A new slab that has high moisture is not cause for alarm but an older slab with high moisture is. Since the moisture of convenience will diminish over time, it is reasonable to assume the moisture content of a new slab will gradually decrease. On the other hand, high moisture readings from an old slab may indicate moisture intrusion from an external source. This type of moisture intrusion is an indicator that the required under-slab vapor retarder is missing or damaged. Some states, counties, parishes, and cities may not require an under-slab vapor retarder. You need to know the building codes in your area and proceed accordingly. Remember, it is always a good idea to follow ASTM F710 when preparing and evaluating concrete substrates.
Gypsum substrates:
Gypcrete should also be moisture tested per the gypcrete manufacturer’s guidelines. Using a pin meter with a gypsum setting is a quick and easy way to test moisture. The moisture content must be acceptable per the gypcrete manufacturer’s guidelines prior to covering the substrate with resilient flooring. Most gypcrete substrates will require sealing or priming prior to installing adhered flooring. This will reduce the porosity of the substrate to prevent over absorption of the adhesive and consolidate surface dust. Failure to properly prime gypcrete can create a variety of installation related problems.
Existing construction:
Before you start any project, you need to know the age and history of the substrate. For existing substrates this includes what previous flooring products had been installed and what types of adhesives had been applied. You need to ask about adhesive removers or abatement chemicals that may have been used since residual contamination in the substrate can attack the new flooring and adhesive. Find out if the building has a history of moisture related issues including floods. This information will help you to determine the best course of action to get the substrate ready for new flooring. It essential that you keep records of all the information gathered in the event of a failure.
Preparing the substrate for flooring:
Resilient flooring requires the substrate to not only be flat as specified in ASTM F710 but it also needs to be smooth. Remember uncorrected substrate irregularities will telegraph through VCT, LVT/LVP, heterogeneous, homogeneous, rubber, and linoleum sheet goods and tile. High spots in wood or gypsum substrates can be easily removed by sanding. High spots in concrete substrates will need to be removed using a grinder with a diamond or, Diamabrush head, shot blaster or even a jackhammer. Low areas should be filed using an appropriate patch or self-leveler. Selecting the right leveling product for your substrate and moisture ranges is essential. I prefer portland based patch and self-levers for most applications. If you are working over concrete, a moisture resistant patch is essential especially under moisture barrier membranes and moisture barrier adhesives. Removing old adhesive from the substrate is essential since the bond of the new adhesive will only be as good as what it is attached to. Existing adhesives can deteriorate from age, moisture, pH and plasticizer migration. Plasticizers from the new flooring can attack old non-plasticizer resistant adhesives such as clear thin spread, cut back asphalt, multi-purpose, broadloom and some other adhesives.
Selecting the right adhesive:
Choosing an adhesive that is designed for use with the type of flooring you are installing is essential. For instance, solid vinyl and vinyl-backed products will need a plasticizer resistant adhesive. Felt backed sheet goods, VCT and solid linoleum do not require plasticizer resistant adhesives. I have seen to many failures caused by an installer or flooring contractor selecting the wrong adhesive for the job such as clear thin spread designed for use with VCT under LVT or LVP. There a few moisture barrier adhesives on the market which provide both moisture protection and bond. Each of these products will perform well when used properly so following instructions and knowing their limitations is critical. There are also many moisture tolerant adhesives on the market. These adhesives will provide a strong bond even over high moisture substrates but they do not protect the flooring from moisture damage. You need to do your homework prior to starting the project to make certain the adhesive or system will meet your needs.
Ultimately you are responsible:
It is up to the flooring contractor/installer to know the necessary steps for a successful installation. Doing your homework by researching, moisture testing and pH testing, as part of the site evaluation is essential. Using the information gathered to help your customer make an informed decision on what their next step should be. As a flooring professional, it is your responsibility to protect your customer. This may require you to turn down the job if the customer will not let you do it correctly. The customer may refuse to budget a sufficient amount of money for proper substrate preparation and moisture mitigation if needed. I cannot tell you how many times I have been on sites where the customer was dissatisfied with their flooring because of uncorrected substrate irregularities. In most cases the flooring installer’s defense was “they wouldn’t pay for the needed grinding or patch”. I have also been on moisture related failures where the customer was advised that mitigation was needed but elected to go without it. In most cases the flooring contractor/installer was intimately held responsible since they are the professionals and should have known better. As I was told many years ago if you cannot do it right don’t take the job.
Meridian is made up of three divisions, each with an assortment of established, leading brands. The Electronics Division provides adhesive solutions for a variety of highly technical industries, such as aerospace, automotive, medical, optical, solar, and others. The Infrastructure Division helps to build and preserve bridges, roadways, and commercial and industrial construction. Meridian’s Flooring, Product Assembly, Packaging Division solves adhesive challenges, from flooring installation to product assembly and packaging.
But more than just building size and corporate growth, the Meridian plan places “growth with a purpose” at the center of its strategy. The purpose is to ensure operational excellence by empowering leadership teams to utilize their decades of experience and expertise to benefit the entire organization.
There are a variety of benefits that are derived from this kind of collaboration:
Enhanced innovation and creativity
Improved efficiency and productivity
Better decision making
Enhanced employee engagement and satisfaction
Increased customer satisfaction
Competitive advantage
Cost savings
Ralph Grogan, Commercial President of Meridian’s Flooring Division, had this to say about the synergy created by being part of Meridian, “The Meridian/Taylor partnership has been a big win for Taylor and our customers. Many of the technologies from the other Meridian Divisions have allowed us to offer our customers new products and solutions they would not have before. For example, technologies from our sister brandAdvanced Technologyin our Infrastructure Division allow us to get involved with flooring contractors who are moving to polished concrete. Technologies from Evans Adhesives allow us to get involved with Hot Melt and Peel and Stick carpet tile. These are things that Taylor could not have done on its own. Of course, this partnership was also extremely beneficial to our customers during the supply chain crisis coming out of Covid. We were able to use the buying power of the total Meridian Adhesives Group to supply material to our customers where a lot of our competitors could not.”
Gary Bartley of Polycom, a Meridian brand specializing in rPVB production and other product assembly components, explained the value of the association this way: “We became a part of the Meridian Adhesives Group in 2019 and after five years of working together, the advantages of being a part of the Meridian Adhesives Group have grown rapidly. Now we can call on a world class technical group to help with product development and share our unique capabilities with other companies in the Group. We are growing and reaching new heights as being a part of the Meridian Adhesives Group.”
It’s often said that when exceptional people come together, exceptional things happen. Meridian Adhesives Group brings these people together to benefit its customers by helping them bond their product ideas to their goals.
By Gary Scheidker, Director of Technical Services, Taylor Adhesives
These unique requirements are each important and can make a significant difference in the immediate and long-term success of the floor. Since these projects can take a while to start and complete, you need to either lock in cost or add a price increase clause to cover any unforeseen material or labor cost overruns.
Flooring, wall covering, substrate preparation and adhesive selection:
Selecting the right flooring and adhesive for the application is a critical first step in any project but even more so for healthcare applications. Nursing homes and assisted care facilities have their own set of challenges since flooring replacements will generally be more frequent. A private medical office will have less stress on the flooring assembly than an urgent care or walk-in clinic. Similarly, a major hospital with an emergency trauma center, operating rooms, and patient rooms will put the most stress on floor covering assembly. Operating rooms will typically require either homogeneous or heterogeneous heat welded vinyl with flash cove to provide a sanitary environment. Some applications may also require wall panels that are heat welded at all the seams and at the flash cove as part of a monolithic envelope to provide a sanitary environment.
I recently ran into a situation where an LVP product was specified for wall covering in a nursing home. The issue with this was the LVP did not have a vertical burn rating. You need to research every component of the installation so you can avoid delays and liability. Before you select your floor covering, wall covering, substrate prep and adhesives, you need to know what type of abuse the floor will be subjected to. You should also guide your customer and their architect or designer in the right direction if they select an inappropriate product. Remember you are ultimately responsible for the success or failure of the floor since you are the flooring professional.
New Construction:
It is important that you know what you are getting into before you start the project. Concrete curing compounds, admixtures, sealers, bond breakers and deicers can all create problems for resilient flooring. Some of these products may require additional substrate preparation to remove or control them. Monitoring the ambient temperature and humidity during acclimation all the way up to occupancy is critical. I recommend using a system like Floorcloud® to make certain the space is under HVAC control at service temperature and humidity. Remember to follow the manufacturer’s guidelines for acclimation. Moisture testing per ASTM F2170 or ASTM F1869 and pH testing per ASTM F710 is essential. Unfortunately, proper moisture testing requires the space to be under HVAC control for a minimum of 72 hours prior to starting the testing process. You will need to include a clause in your contract for moisture mitigation if needed. Many architects are now including moisture mitigation as part of their specification, which is great for our industry. Check to see what arrangements the general contractor has made for secure space to store product and equipment on site. You may need to supply a storage container and even a forklift on some projects.
Remodel:
Working in an occupied facility will present a unique set of problems. I recommend including SDS and TDS documents for every component that will be used in the installation in your submittal. This includes flooring, underlayment, patch, leveling products, adhesives, and seam sealers. Know the age and history of the building and substrate. Moisture testing per ASTM F2170 or ASTM F1869 and pH testing per ASTM F710 is important. You should also consider the age of the slab as part of the evaluation. Remember an older slab with high moisture readings indicates moisture intrusion from an external source. This type of moisture intrusion indicates the absence of a functioning under-slab vapor retarder. Test for lead and asbestos if the building age is from the period where they could have been used in paint or floor covering. The space will need to be sealed to prevent dust and construction odors from entering occupied areas. You will need to remove the existing flooring and prepare the substrate with as little noise and dust as possible so planning is critical. The general contractor should make space to store product and equipment and you may need to supply a storage container and forklift on certain projects.
Qualified labor:
Remember not all installers have equal skill levels. Having a pool of qualified floor mechanics available will be essential for a successful on time completion. Finding enough qualified mechanics to complete the project in the allotted amount of time can be a challenge in certain markets. Some projects may even require mechanics that can pass a background check. This is not always as easy as it sounds. If you are a union shop in an area with a good training and apprentice program the availability of qualified labor is generally good. If you are not a union shop, you may want to contact one of the independent training organizations like International CFI, INSTALL, IUPAT, AFT, NAFCT, or UNITE to find qualified resilient flooring mechanics in your area.
Environment:
Every area has its own unique set of challenges. Large healthcare projects can take a long time to complete. This means that the project may start in the spring and continue through winter or longer. Each season will bring on new challenges, which in some areas can be significant. You need to consider this when you bid a project especially regarding a commitment to a completion date.
Liquidated damages:
This is where the completion date comes into play. If you miss the agreed upon completion date, the liquidated damages can be significant. When you make a commitment to a date to have a floor ready to be turned over for occupancy, you need to make certain that it is attainable. Your project manager needs to monitor the progress of the project to make certain the project is moving along as planned. Additional personnel or equipment may be needed if the project starts to run behind schedule.
Maintenance:
Your responsibility for the floor does not end when the floor is completed. Improper maintenance can create issues with even the best flooring installations. It is important that you provide the facilities management department with the proper care and maintenance of the flooring product being installed. This should include proper cleaning methods, cleaners, and finishes. You need to know the specific maintenance requirements for the type of facility you are working in. These requirements can vary from state-to-state or even county-to-county. Some of these aggressive cleaning methods may stress the flooring in unforeseen ways. For instance, assisted care and nursing homes may be required to clean the common areas twice a day using hot water extraction units. This cleaning method will soften the floor every time it is used, causing the flooring to contour to any substrate irregularities and telegraphing them through the flooring. Extreme care to substrate preparation and back rolling adhesives will go a long way to avoiding an issue from this cleaning method. Planning ahead can save you headaches in the future.
When life gets messy, you need a floor that’s simple to clean
What to do
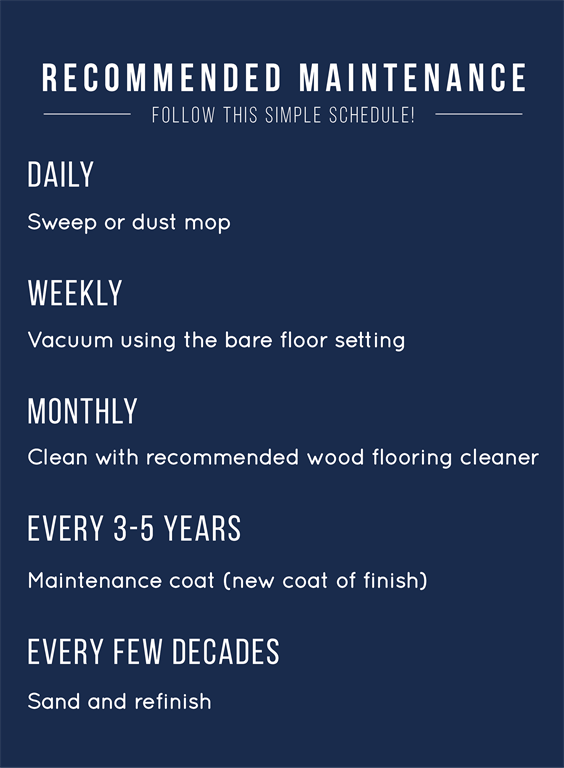
Clean regularly with a broom or dust mop or even vacuum using the bare floor setting to remove dust and dirt.
Clean the floors periodically with a professional wood floor cleaning product recommended by a wood flooring professional.
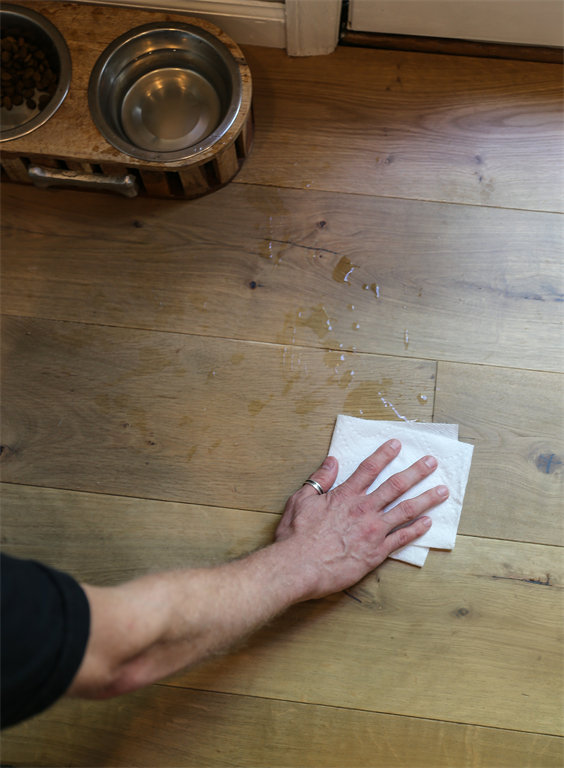
Wipe up spills immediately with a dry or slightly damp cloth.
Follow the manufacturer’s cleaning recommendations.
What not to do
Use wet mops or steam mops, which can dull the finish and even damage the wood.
Use vinyl or tile cleaning products on wood floors. Self-polishing acrylic waxes cause wood to become slippery and appear dull quickly.
Use wood furniture polish, which can make the floor dangerously slippery, and damage the finish.
Over-wax a wood floor. If a wax floor dulls, try buffing instead.
Individual maintenance schedules will vary depending on use, wear and tear, and lifestyle, but here are some additional tips for keeping your floors beautiful:
Use throw rugs at doorways to help prevent debris from being tracked in and scratching the floor.
Put stick-on felt protectors under the legs of furniture to prevent scuffing and scratching.
Avoid walking on your wood floors with sports cleats and high heels.
When moving heavy furniture, pick it up instead of sliding it across the floor.
Thank you Libby White Johnston, Publisher & VP of Media National Wood Flooring Association I Hardwood Floors Magazine
By Gary Schiedker Director of Technical Services, Taylor and Meridian Adhesives
Proper flooring care and maintenance is much more than just proper cleaning. It includes maintaining the space at acceptable temperature and humidity levels for the floor covering and protecting the floor covering from potential damage. Insufficient or improper maintenance can affect resilient flooring, hardwood flooring, and even carpet. These are a few of the most common causes of flooring failure that could have been easily avoided with proper care.
Temperature and humidity fluctuations
Every resilient or wood flooring installation should start with proper acclimation. It is critical that the space continues to be maintained at proper service temperature after installation. Fluctuations in temperature and humidity can cause failures with most resilient flooring and all hardwood flooring products. Even carpet can relax from high humidity and possibly require a re-stretch. It is important that you include climate control as part of the maintenance instructions that you provide to your customer. The space should be maintained under HVAC control year-round including off hours. It is not acceptable to shut off or turn down the HVAC during nights, weekends, or holidays. For commercial applications, you may want to recommend an environmental monitoring system like Floorcloud® to make certain the space is properly maintained.
Direct sunlight
Many flooring products require protection from direct sunlight. In the case of resilient flooring, direct sunlight exposure can cause it to expand when it is heated and then shrink as it cools. In the case of LVT and LVP, the most common results are peaked or gapped joints. As the flooring is heated, it expands creating pressure on the neighboring tile or planks. Then as it cools, it may shrink leaving gaps at the joints. With sheet goods, the heat can cause the flooring to expand thereby creating bubbles that may never recover. Hardwood can change color from direct sunlight, which will become obvious when furniture or rugs are moved. I have even seen “checking” in the finish of hardwood that only occurred where it was exposed to unbuffered sunlight. It is important that you include the recommendation of window treatments such as curtains, blinds, shutters, or tint to provide protection from direct sunlight in windows. These are exposure considerations in your recommended maintenance instructions.
Caster chair and other furnishings
Caster chairs in offices can damage resilient flooring, hardwood flooring, and carpet if proper protection is not used. The use of chair pads are essential in office settings where caster chairs are used. Failure to protect the flooring from caster chairs in commercial applications can cause the new floor covering to prematurely wear or ugly out. Using the right chair pad for your application is essential for good results. You should be specific when making recommendations regarding chair pads to your customer. The use of felt or other soft protectors on chair or furniture legs are also important and should be included in your recommended maintenance instructions. The use of walk off mats should always be recommended at doorways that open to exterior, dirty, or wet areas. These steps will keep the floor looking good for a long time.
Improper cleaning products
I cannot believe how many flooring failures I have seen that could have been easily avoided by simply following the instructions on the label of the cleaner. In many cases, the maintenance people use the wrong cleaner or simply use a high concentration. Some of these cleaners are citrus based and have a pleasant sent. Unfortunately, the citrus cleaners are acidic and can attack the adhesive and floor covering. I have seen citrus cleaners attack the latex that attaches the secondary back to the primary back of the carpet. They have also caused finishes to dull and leave oily residues on the surface. We had one case where a chain of veterinarian clinics was having problems at a couple locations and no issues at the others. They had the same flooring and used the same disinfecting cleaner in all their locations. It turned out that high concentrations of the cleaner were attacking the flooring assembly. This disinfectant was so strong at full strength that it ate the epoxy floor in our testing area. We placed the jug on the shelf and it leaked over the weekend. When we came back on Monday, the epoxy had flaked off the slab in the spill area. I highly recommend that you recommend the right cleaning products and method for the floor you are installing.
Excessive amounts of water
We see too many crazy things when we go to inspect a floor. I had a situation with VCT at an elementary school that was obviously moisture related. This was a new slab with a good quality under-slab vapor retarder installed. The flooring contractor performed both In-Situ RH tests per ASTM F2170 and Calcium Chloride tests per ASTM F1869. We were at a loss as to the source of the moisture until we found a maintenance man using a garden hose to clean the floor. I had another one at a high-end resort with hardwood floors. Part of the floor was over plywood on pier and beam and part was over on-grade concrete slab. I saw the maid throw a pail of water on the floor and swab it like the deck of a ship. I drove five hours to look at a solid wood floor that was cupping. When I arrived, I noticed a mop and a bucket with a jug of oil soap next to it in the kitchen. It turned out the homeowner wet moped the floor weekly with oil soap diluted in water. We asked her to change her cleaning method and the cupping subsided.
Hot water extraction machines
We typically think of carpet cleaning when it comes to hot water extraction units which are also called steam-cleaning machines. This cleaning method can leave both the carpet and the cushion wet, which will cause it to attract soil and crush from traffic. If this method is used it is necessary to allow the carpet and cushion to dry prior to traffic. Excessive amounts of cleaner will also attract soil and cause the carpet to crush in traffic areas even when dry. For hard surface, some state and local agencies require nursing homes, assisted care facilities and day care centers to clean the common areas up to two times a day. In many cases, these facilities use walk behind hot water extraction units to clean the floors. This hot water will soften the resilient flooring, which allows it to contour to any irregularities on the substrate and telegraph them. You should consider this when selecting an adhesive and recommending the flooring.
Floor finishes
It may sound crazy but have been on multiple complaints where the property owner had a maintenance company apply a sacrificial finish to the floor. This is not an issue unless the gloss level of the coating is different from the factory finish. In every case, the property owner complained that the floor was different from what they selected. It is important that you educate your customer on acceptable applied finishes and how they can affect the gloss level of the floor.
Conclusion
I recommend that you prepare a recommended maintenance guide for your customers to follow that will help them know how to maintain their new floors. This may require separate guides for carpet, resilient and hardwood since their care can vary greatly. This will help you avoid claims while keeping your customer happy.
By Seth Gladden Director of Marketing, Meridian Adhesives Group Flooring Division and Taylor Adhesives
SET: Understanding the types of adhesive “set” can make the difference between a perfect installation, or one that results in unnecessary challenges. The type of adhesive desired, as well as the set you want to achieve will be dependent on flooring types and installations. For example, in a healthcare environment where heavy rolling loads are common, it is important to avoid a soft-set adhesive. However, when installing modular carpet tile, a soft-set adhesive would be a better choice to allow for a releasable installation. The following definitions will help ensure your next project is on the path to success.
Wet-Set: With a wet-set adhesive, flooring material must be installed while the adhesive is still wet to ensure a proper bond. This term is most commonly used with broadloom carpet, rubber, hardwood or ceramic tile flooring, however some other products, including resilient (modular and sheet) and esd (conductive) will allow for a wet-set adhesive. A wet-set installation usually means a permanent bond, as these will not release from the substrate or flooring product and will give you much higher sheer and peel strength.
Semi-Wet Set: Typically the term semi-wet-set is used in reference to resilient flooring adhesives, and means that the adhesive begins to skin over prior to flooring installation. It is important to note that there needs to be wet adhesive underneath, allowing transfer to the flooring, resulting in a more aggressive bond than a traditional dry-set application.
Dry-Set: To properly achieve a dry-set installation, the adhesive must be allowed to flash-off or become dry to the touch (with no transfer) prior to any flooring material being installed. This type of set is commonly used with resilient and modular carpet flooring installations that require pressure sensitive adhesives (PSA).
Soft-Set: A soft-set flooring adhesive stays in a soft, pressure-sensitive state which allows for easier, lifetime modular flooring reposition/replacement installations. This type of adhesive is typically used in a “dry-set” installation, however, even though these two terms seem similar, they are not always interchangeable.
Firm-Set: The adhesive will achieve a partial or hybrid transition, starting with the benefits of a PSA and leading to many of the benefits of a hard-set adhesive.
Hard-Set: The adhesive will fully crosslink or set-up, resulting in a product that will not indent or disperse, even when exposed to heavy rolling loads. Often, these are able to not only withstand high moisture, but can also protect flooring from moisture damage. Always check the product documentation to verify moisture tolerance vs barrier (see Part I).
TRAFFIC: Knowing the needs of the customer helps in choosing the right adhesive for a flooring installation and achieve the ultimate goal of getting them into their space as soon as possible. A solid understanding of the meaning behind traffic times is critical for a successful installation and will help set clear expectations, minimize callbacks and increase customer satisfaction. If traffic is allowed on the flooring prior to the published times listed on the adhesive, it can lead to flooring failure (slippage, movement, indentation and adhesive displacement) and client frustration due to callbacks, delays, aesthetics and safety. If the client needs to access a space faster than the adhesive allows, contact the adhesive manufacturers technical department and ask for a job-specific warranty exception, or consider choosing a different product.
Light Traffic: The light traffic designation dictates when an area can be opened back up for common foot traffic in low to moderately accessed areas (this does not include hallways or other high-traffic areas). Often light traffic is allowed much sooner than other types of traffic, and for good reason. If an adhesive has not been allowed the proper time to fully cure or crosslink, the wrong types of traffic could allow slippage, movement, indentation, adhesive displacement, telegraphing, peaking, gapping and other issues.
Heavy Traffic: This is when an area can be opened back up for all types of foot traffic, as well as normal activity use (including rolling desk chairs, mail carts, light office equipment, vacuuming, etc.). Think of heavy traffic as most anything that happens in residential, multi-family, main-street (moderate) commercial, corporate, education and hospitality markets. If you ever have a question about something specific, always contact the adhesive and flooring manufacturer to make sure you are using the right products.
Heavy Rolling Loads: An area can be exposed to extreme levels of use including Hilrom (hospital) beds, gondola shelving (retail), medical equipment (mobile x-ray units, etc.). NOTE: It is extremely important to ensure that the adhesive and flooring products used can handle heavy rolling loads before using it in an area that requires these types of traffic. Heavy rolling loads are typically seen in what is considered heavy commercial markets including healthcare, long-term care and retail.
SOUND: As one of the five senses, sound is an extremely important aspect when it comes to the flooring industry. Often, our daily quality of life revolves heavily around sound, or lack thereof. Everything from being able to concentrate at work, school, getting enough sleep or just relaxing revolve around the acoustic atmosphere we are exposed to. If everything goes right, our interior environment is designed to block or minimize the sounds present around us on a daily basis. This holds especially true in the multi-family and hospitality markets as having shared walls, and floors, can make or break the experience of the inhabitants. Understanding the below terms is important for anyone that works in these markets in order to achieve the specified or desired sound ratings.
STC (Sound Transmission Class): This is the rating (or measurement) determining how well a product (as part of a floor/ceiling assembly) resists (or blocks) the transmission of airborne sounds. These include speaking, music, television, dog barking and other commonly heard sounds. The higher the number, the better it will block unwanted noise. The Uniform Building Code (UBC) requires a minimum STC of 50 for dwelling units (including hotels), although many clients have higher standards.
IIC (Impact Insulation Class): Sometimes referred to as Impact Isolation Class, this is a rating (or measurement) determining how well a product (as part of a floor/ceiling assembly) resists (or blocks) the transmission of structure-borne (impact) sounds. These are typically defined as footsteps, furniture movement, etc. The higher the number, the better it will block unwanted noise. The Uniform Building Code (UBC) requires hotels/motels and multi-family units/buildings to meet a minimum number of 50 (or 45 if tested in the field).
∆ (delta) IIC: This is a rating (measurement) that determines how much a specific product effects the IIC of a specific assembly. The higher the number, the better the end result, leading to quieter floors. For flooring adhesives, an IIC number includes the entire assembly (ex. 6” concrete overlaid with adhesive and flooring, with a suspended gypsum ceiling). The difference with the delta IIC is that it factors out all parts of the assembly expect one (for our purposes, the flooring adhesive itself). This can often be a better gauge of the success of your assembly without having to test each parameter (due to the cost of proper testing).
Clearly there are a lot of industry terms related to flooring adhesives and we still have quite a few to explain in Part IV. Remember anytime you have a flooring adhesive question, reach out to the manufacturer or an industry partner like CFI, INSTALL, IUPAT, or NWFA as they are always eager to help.
By Gary Scheidker Technical Services Director, Taylor Adhesives
Substrate preparation is the foundation of your sheet vinyl installation, and one of the most important steps in the installation process. It does not matter what type of sheet vinyl you are installing. The result will depend on a good foundation.
I have seen many floors where sheet goods were installed directly over OSB without an additional underlayment or skim coat to smooth the substrate. In these cases, I recommend installing ¼” birch plywood underlayment, and filling the joints and nail holes, to provide a smooth base for your sheet goods. If the additional thickness of the plywood will be a problem, a skim coat of high-quality Portland-based patch can provide a suitable substrate when properly applied.
When installing over concrete substrates, the substrate must be clean, flat, and smooth per ASTM F710. It may require diamond grinding to remove crowns and the filling of low areas. Selecting the appropriate Portland-based patch or self-leveler is critical. You need to select a product that will withstand the substrate moisture and pH ranges. It is also critical the powder manufacturer’s instructions for water ratios and mixing are followed.
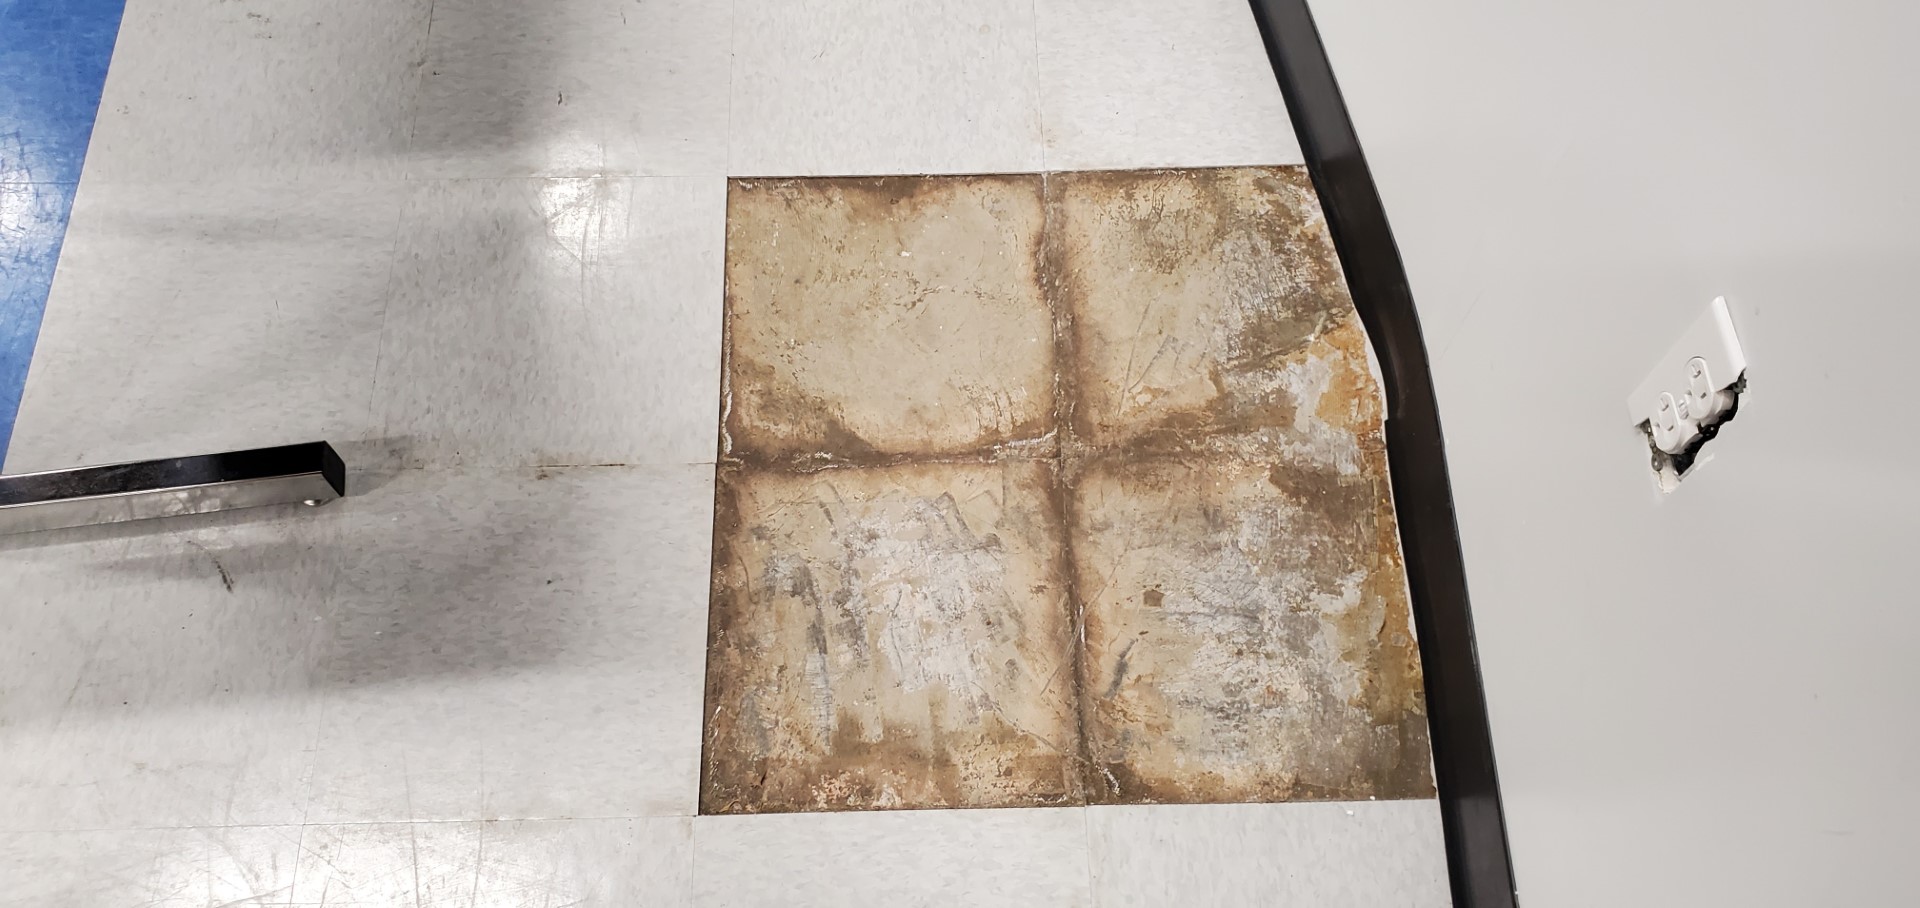
Installing sheet vinyl directly over old adhesive residue is always a bad idea. If you are installing vinyl-backed sheet goods, the plasticizers in the backing can attack non-plasticizer-resistant adhesives such as clear, thin spread, latex, and cutback. It is always best to remove these old adhesives since the new adhesive is only as good as what it is stuck to.
Moisture and pH testing must be performed when installing resilient flooring over concrete and gypcrete substrates.
Most flooring and adhesive manufacturers only recognize ASTM F1869 or ASTM F2170 when moisture-testing concrete substrates.
Testing is only valid if the space is fully enclosed and under HVAC control for a minimum of 72 hours prior to placing the tests.
When you test a concrete substrate, you must also consider the age of the slab.
High RH or MVER readings in an older slab indicate moisture intrusion from an external source. Moisture intrusion from below indicates the under-slab vapor retarder may be missing or has been compromised.
You should also consider the grade of the slab since below-grade slabs can potentially be subject to a hydrostatic head.
Gypcrete substrates can generally be moisture-tested using a pin meter with a gypsum setting. Most gypcrete manufacturers require the substrate to be at 5% or below prior to installing resilient flooring.
Excessive moisture and high or low pH can attack the flooring and the adhesive.
Before starting any installation, please know the moisture and pH limitations of all the products you are installing including patch, underlayment, adhesives and flooring.
I have seen too many failures that could have been prevented with proper acclimation. This step is critical for resilient flooring products since they are typically thermal reactive. Many installers erroneously think flooring can be acclimated anywhere in the building it is being installed in, and only requires one day.
Acclimation must be performed in the room where the flooring is being installed, and the space must be under HVAC control at service temperature.
The service temperature is the temperature which the space will be maintained when occupied.
The acclimation is complete when the flooring reaches equilibrium with the room temperature.
The acclimation period can take longer depending on the difference in temperature from the storage environment to the service temperature.
Yes, the laws of physics even apply to new construction.
Using the wrong adhesive has caused many issues over the years.
Selecting the right adhesive for your flooring, and the application it is going into, is vital.
Different types of vinyl sheet goods require different adhesives. Fiberglass-backed sheet goods typically call for a releasable pressure-sensitive adhesive. Felt-backed sheet goods typically call for a latex multi-purpose, epoxy, or moisture-cured adhesive, depending on site conditions and usage. Felt-backed sheet goods do not require plasticizer-resistant adhesives. Depending on site conditions and use, Homogeneous sheet goods require plasticizer-resistant adhesives such as acrylic, epoxy, or moisture-cured.
If the sheet vinyl has a vinyl backing/bonding surface, the adhesive must be plasticizer-resistant.
Since vinyl seams are never invisible, seam placement should be considered before starting the installation. Many installers place seams where they are most convenient instead of in inconspicuous locations. I have seen fill seams a few inches away from doorway seams because they were shorter than placing them along the wall on the opposite side of the room. Obviously, every installation is unique, and seam placement will vary from floor to floor.
You should avoid placing seams in areas that will make them stand out.
Cross-lighting can make a seam stand out and should be avoided if possible.
Avoid placing seams next to each other.
Improper seam sealers and welding have also been an issue. Different sheet vinyl products require different seam sealers. You need to follow the flooring manufacturer’s installation guidelines for the proper way to seal the seams with their products.
Most homogeneous sheet goods require a chemical weld or heat welding to seal the seams. This is particularly important in healthcare applications to prevent bacterial growth from developing under the flooring.
Fiberglass sheet goods are dimensionally stable and are typically used in residential and multifamily applications. Seam sealers for these products are generally intended to prevent moisture intrusion at the seams and do not require a chemical weld to prevent the seam from opening.
Heterogeneous sheet goods will typically have felt or mineral backings. Unfortunately, the vinyl face of these products can shrink over time, causing the seams to open. The proper seam sealer will chemically weld the seam, preventing the seam from opening.
I can’t tell you how often I have seen issues that could have been easily avoided by simply using kneeboards. Kneeboards are essential any time you are installing resilient flooring with a wet set or semi-wet set adhesive.
Working on top of sheet vinyl installed with a wet set adhesive can cause the adhesive to displace and leave indentations or even loose bonds.
Anyone installing vinyl with a reactive adhesive like epoxy, or a moisture-cured adhesive must work on top of kneeboards.
Some latex and acrylic adhesives will also require a wet set or semi-wet installation method.
We used to use tempered Masonite, although birch plywood, Luan or Styrofoam board will all work.
The kneeboard must be large enough to cover anywhere your knees, toes, or feet will put pressure on the flooring.
I recommend having enough kneeboards to be able to move around the floor without displacing adhesive.
By Seth Gladden Director of Marketing, Meridian Adhesives Group Flooring Division and Taylor Adhesives
SUBSTRATE… According to Merriam Webster Dictionary, a “substrate” is “the base on which an organism lives” or “a substance acted upon…”. However, with its Latin prefix sub- (below) substrate refers to a layer under something else. In flooring, that layer can be concrete, wood (plywood, OSB, etc.), existing flooring materials (well-bonded vinyl products, terrazzo tile, etc.) or other surfaces that adhesives are used to bond flooring material.
Used in this context, it might be better to refer to a substrate as a foundation, since what you put on top of an adhesive is only as good as the foundation (substrate) it is bonded to. This is why substrate preparation (proper or improper) has such a massive impact on the outcome of any flooring installation. This foundational step must be given the respect and care it deserves and makes understanding the terminology behind it that much more important. For more information on proper substrate preparation, check out TAYLOR TIME LIVE – S1 E2 – “Prep for Success”. Below are some of the most frequently referenced terms regarding substrates.
Porous = In reference to flooring (usually concrete), porous means the substrate will absorb products (adhesives, coatings, etc.) into its surface pores (capillaries, etc.). This is a key factor for topical concrete moisture-blocking products and can also affect coverage rates and/or performance for many flooring adhesives. A simple, sixty-second waterdrop test (ASTM F3191) can be performed to check the porosity of concrete and can save you from spending extra time and money. Be cautious when dealing with porosity however as some products and manufacturers require different concrete surface profiles (see CSP below) to attain porosity.
Non-Porous = When dealing with flooring, a non-porous substrate does not allow absorption of products/adhesives. Although many flooring adhesives and applications allow a non-porous substrate, always check the product documentation to ensure you are using the right trowel size to avoid unwanted telegraphing, product slippage, adhesive bleed-up through joints or other related issues. It is vital to note that most concrete coatings, especially moisture-barrier products, require a porous substrate (see above).
Concrete Surface Profile (CSP) = A concrete surface profile (CSP), is a measurement of the surface roughness as defined by the International Concrete Repair Institute (ICRI) on a scale from 1-10 (1 being very smooth and 10 being very rough). This is determined by measuring the surface profile depth, or in other words, the distance from the top of the peaks to the bottom of the valleys in a concrete surface (when viewed as a cross-section). Often referred to as its texture, the CSP scale of 1-10 ranges from approximately 1/32” (CSP 1) to 1/4” (CSP 10) variance. Many manufacturers of topical moisture-barrier products require a certain CSP in order to achieve both a porous substrate as well as a mechanical bond.
ASTM F710 = Considered the gold standard in flooring substrate preparation, this ASTM was created to outline the proper way to prepare a concrete substrate to receive resilient flooring. However, this ASTM is often used by flooring adhesive manufacturers as a reference guide for all kinds of flooring substrate preparation. Some of the biggest factors called out specifically for all kinds of flooring products are the following.
Flat: ASTM F710 calls out that a substrate must be flat prior to an adhesive being applied and a floor covering material being installed. While this is an important part of substrate preparation, flat is often confused with level. These should not be confused as flooring adhesive manufacturers do not require a level substrate to achieve a proper bond. A flat substrate however is extremely important as it will help prevent unwanted telegraphing, hollow spots, or unsightly undulations in the finished floor.
Free of contaminants: This is an extremely important part of ASTM F710, especially when it comes to flooring adhesives. Due to the chemistry of most adhesives, unknown contaminants can interact with them in ways that result in flooring failures. Contaminants can come in many forms and from many sources, so knowing the history of the concrete and ensuring you have a slab free of contaminants can save you a lot of time, money and callbacks.
Structurally sound: This sounds easy, because let’s face it, concrete is one of the most common, and robust building materials on the planet. However, there are a lot of things that can happen to concrete that will adversely affect it. Most often, this will be more of a concern with older concrete and should be something that you pay special attention to when doing renovations or remodels, however even brand new concrete can suffer from not being structurally sound. Everything from stress fractures, cracking, crazing, spalling, pH loss, rebar corrosion, and excessive efflorescence can all signal that a concrete slab has begun to lose its structural integrity. Remember, thinking of a substrate as a foundation will help you understand the importance that this qualification plays in the success of a flooring installation.
TIME… You can’t make more of it, but you can use what you have wisely. When it comes to flooring adhesives, knowing the meaning behind the different times can help you correctly plan your jobsite and optimize it for both you and your client. It is important to note that not all flooring adhesive manufacturers use the same “time” terminology for the same things. Some terms are often used interchangeably, but they may carry different meanings, so always check the documentation, or contact that company technical support if clarification is needed.
Open Time = Commonly used in reference to wet-set adhesives, this is the time from adhesive being spread until you can begin installing flooring material.
Flash Time = Typically used in reference to dry-set adhesives, this is the time needed for an adhesive to dry-to-the-touch (no transfer to fingers) prior to flooring materials being installed.
Working Time = The amount of time that flooring material can effectively be installed and still meet warranted performance levels. This starts after “open time” or “flash time” depending on the adhesive.
Dry-Time = This is one that can be a source of confusion as some manufacturers use it to describe “flash time” and some use it to describe “cure time”. Technically, this term should refer to the amount of time it takes an adhesive to fully dry, meaning all the way through (not just the top layer), however this is sometimes hard to quantify given substrate and atmospheric conditions. This is why at TAYLOR, we do not reference “dry time” and instead rely on the other terms found here.
Cure Time = This is the amount of time that it takes an adhesive to be fully cured and meet the intended performance characteristics. This does not mean that the adhesive is done fully crosslinking (see Part III, next edition) as this can take much longer (days or even weeks), however it does mean that the product will perform according to all the warranted levels.
Pot Life = Commonly used in reference to 2-part epoxy systems, this is the amount of time a product has from when it is mixed until it sets up in the pail. Once the epoxy is out of the pail (on the substrate) it may remain viable a little longer than in the container. This is due to the heat generated by the exothermic chemical reaction when the components are combined, and when confined in the pail the heat has nowhere to escape.
As you can see, there is a lot of meaning behind each of these commonly used terms. In fact, there is far more that could be explored and understood in each of these categories, so I encourage you to continue doing your own research. Understanding exactly what you are working with will help you stay ahead of the competition, save you time and money, and achieve a better result.
By Seth Gladden Director of Marketing, Meridian Adhesives Group Flooring Division and Taylor Adhesives
For several articles going forward, we’ll examine many common yet sometimes misunderstood terms. Getting them wrong can cause installers heartache, heartburn, and money. That’s because it’s not enough to speak the language of flooring installation. You’ve got to know what it means, too.
Let’s start with everyone’s favorite topic: moisture. Test your knowledge against these eight terms. If you ace all eight, that’s great! If you miss a few, this has been a worthwhile review!
RH = Relative Humidity – This is not to be confused with atmospheric relative humidity, although that does play an important part as well (temperature, humidity, air pollutants, dew point, barometric pressure, sunlight, airflow). In the flooring industry, RH testing refers to the process of drilling and placing a test probe in a concrete slab. It measures how much moisture is present in relationship with how much moisture could be present, or in other words, a percentage of saturation. The higher the number, the closer to standing water you get. It is important to remember that this depends on atmospheric conditions and that RH is only a snapshot in time and can change with time and seasons. Remember high-school chemistry? Whether you are a fan of it or not, one of the easiest ways to think of RH is that it is like potential energy (stored), whereas MVER is like kinetic energy (moving).
MVER = Moisture Vapor Emissions Rate – also known as the Calcium Chloride test (CaCl)- a measurement of how much moisture vapor emits from a concrete slab (ASTM F1869). The higher the MVER number, the more moisture is emitting from the slab, which can lead to flooring failures, mold, mildew, and a host of other problems. An MVER of 8 lbs means that eight pounds of water vapor is emitting from every 1000 square feet every 24 hours. Water weighs in at just over eight pounds per gallon, meaning that almost a gallon of water comes out of that 1000 square foot daily.
pH = A measurement of the acidity, or alkalinity of a substance. As it relates to flooring, this applies primarily to concrete slabs. Newly placed concrete holds a pH of 12-13 on the inside and often 10-11 on the surface. If concrete drops below this healthy internal pH level, the rebar will begin to corrode and the concrete will lose strength and durability, exhibit spalling/cracking, and can lead to complete structural failure. However, higher levels of pH can attack adhesives and even floor covering materials. Be sure the products chosen can withstand or even block unwanted alkalinity. NOTE: pH is measured on a logarithmic scale, meaning that for every number the pH increases, it is ten times more alkaline (ex. pH of 12 is ten times more alkaline than a pH of 11).
Waterproof Bond = This means that once fully cured, an adhesive will achieve a bond that cannot be broken down or re-emulsified by water alone. However, this does not mean the adhesive provides any protection against moisture. Always check for moisture barrier products vs. moisture tolerant products. Water is a great carrier and can bring high alkalinity (pH) to the surface along with it, so if an adhesive that forms a waterproof bond does re-emulsify, it is typically indicative of a high pH environment.
Water-Resistant Bond = This is referring to an adhesive that once fully cured, will be resistant to its listed levels of water vapor. However, if exposed to higher levels of water vapor or standing water, these products can lose their tack and lead to a loss of proper bond, likely resulting in a flooring failure.
ASTM E1745 = This is the “Standard Specification for Plastic Water Vapor Retarders Used in Contact with Soil or Granular Fill under Concrete Slabs,” or as most in the flooring world know it, the requirement of having an intact, sub-slab moisture vapor retarder. Even though it’s considered standard practice in new construction to install sub-slab vapor retarders, older concrete slabs may not have one, especially for 20+ years. Even if an older slab has one, it is likely not intact due to disintegration and time, making it vital to verify if one is present and in good condition. Typically, this requires drilling a core sample and can still give inconclusive results. It is essential to know that most products designed to go over concrete, including patch/level products, adhesives, coatings and primers require an intact, sub-slab vapor retarder be present in order for their warranty to be valid.
Hydrostatic Pressure = According to Dictionary.com, this is defined as “the pressure exerted by a fluid at equilibrium at a given point within the fluid, due to the force of gravity. Hydrostatic pressure increases proportionately to depth measured from the surface because of the increasing weight of fluid exerting downward force from above”. Despite how scary hydrostatic pressure sounds (and can be), it is actually a very rare problem, although many moisture issues are mistakenly given this label. Essentially, it is pressure in the capillaries and pores of the concrete, being driven through the concrete slab by some external force. The most common culprits leading to hydrostatic pressure are improper drainage or a high-water table. Often, leaky, or broken water pipes are lumped into hydrostatic pressure, however, they are technically considered hydraulic pressure but result in similar issues.
Moisture Barrier vs Moisture Tolerant Adhesives = This is one of the most widely misunderstood concepts regarding flooring adhesives today. When adhesive manufacturers assign RH, pH, and MVER data points (numbers) to their products, the adhesive can withstand or “tolerate” those levels. However, just because an adhesive can tolerate high moisture (ex. 99% RH, 12 lbs MVER, 12 pH) does not mean the adhesive will offer any moisture protection for the floor covering material being installed. If you are looking for a product that can withstand and block moisture, you need to look for moisture barrier adhesives.